Application Execution with Croupier
Introduction
Croupier is a meta-orchestrator that enables end-users, either application providers and consumers to deploy and execute applications across multiple HPC infrastructures, and move data from one infrastructure to another. Application providers use Croupier to make their applications available for consumers in the Croupier marketplace. Application consumers browse available applications and execute then in selected HPC infrastructures.
Prerequisites
The Croupier administrator should take care of installing all required dependencies and the Croupier plugin. Atos make Croupier ecosystem accessible through its frontend at http://frontend.croupier.ari-aidata.eu.
Croupier’s framework
Croupier framework consist of several interconnected services, namely:
Cloudify (https://cloudify.co/) is the Cloud workflow engine that hosts HPC-based workflow executions by using Croupier as a plugin.
Keycloak (https://www.keycloak.org/) is an IAM service that offers a SSO across multiple application. Croupier frontend uses KeyCloak to authenticate users
Hashicorp Vault (https://www.vaultproject.io) is a secret store. Croupier frontend uses Vault to retrieve HPC user’s credentials to get access to the target HPC frontend on behalf of the user.
Vault Secret Uploader (https://github.com/ari-apc-lab/vault-secret-uploader) offers an REST API interface for CRUD operations of Vault secrets. This API is used by users to store their credentials
HPC Exporter (https://github.com/ari-apc-lab/hpc-exporter/tree/nojwt) collects HPC partition/queue and job execution metrics when requested by the main monitoring engine (i.e. Prometheus)
Prometheus (https://prometheus.io/) is the main monitoring engine in the Croupier framework, storing collected metrics and offering SQL-like quering language PROMQL.
Grafana (https://grafana.com/) is the main metrics visualization tool used to render HPC partition/queue and job dashboards
Grafana Registry (https://github.com/ari-apc-lab/grafana-registry) tool is used to register Grafana dashboards for users executing workflows
Croupier backend (https://github.com/ari-apc-lab/croupier-backend/tree/permedcoe) is the backend implementation of the Croupier Web-based interface. This component iteracts with Cloudify for workflow managemente and execution
Croupier frontend (https://github.com/ari-apc-lab/croupier-frontend/tree/permedcoe) is the frontend implementation of the Croupier Web-based interface. It provides the Web UI that interfaces application consumers
Contact Croupier administrator (jesus.gorronogoitia@atos.net) for instructions to deploy and configure instances of these services required by Croupier.
Kubernetes (k8s) manifests for the manual deployment of the Croupier services listed above are available at GitHub: https://github.com/ari-apc-lab/k8s-resources/tree/permedcoe
Helm charts for k8s semi-automatic deployment are available at (e.g. some manual configuration is still required): https://github.com/ari-apc-lab/k8s-resources/tree/permedcoe/helm-charts
Croupier plugin installation
To install Croupier plugin, you need a Croupier Wagon file, compiled for CentOS.
Contact Croupier administrator (jesus.gorronogoitia@atos.net) for the latest
Croupier wheel and the plugin.yaml descriptor. Next, log into Cloudify
the with admin account.
Click on the Resources tab in the leftmost panel. Next, click on the Plugins
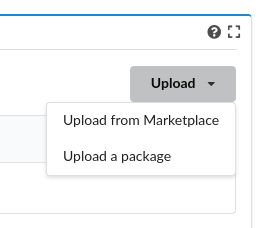
tab in the main page. Then, click on the upload button on the right of the
Plugin list table. Select upload a package
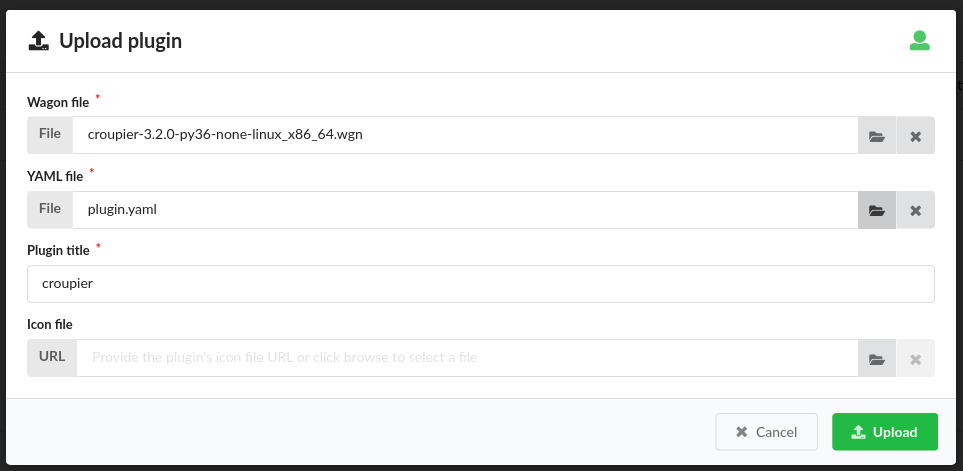
Then, in the wizard, browse click on the File button to search in your file
system for the Croupier Wagon file, and similarly for the Croupier YAML file.
Once selected, check the Plugin title is set to croupier.
Click on the Upload button to accept.
Check the Croupier plugin installation in the list of plugins.

Application definition (Blueprint)
Application providers define their applications as meta-workflows that execute multiple tasks (in sequence or in parallel) distributed across one or more target HPC infrastructures. These workflows are named blueprints in Cloudify terminology. They may also specify data objects, their role as tasks’ inputs and/or outputs, the data infrastructures where those data objects are located at and the transfer entities that move such data objects from one source to a target. Croupier’s workflows are specified in YAML by using the OASIS TOSCA language (https://docs.cloudify.co/latest/developer/blueprints/). For the following, we use the Covid19 application as an example.
The application workflow starts with a header that at least declares the imports to use the Croupier plugin. Other imports could be possible if required by the application.
tosca_definitions_version: cloudify_dsl_1_3
imports:
    - http://raw.githubusercontent.com/ari-apc-lab/croupier/master/resources/types/cfy_types.yaml
    - plugin:croupier
Next, application data types can be optionally declared. In the following example, the Covid19 application input arguments are declared
data_types:
permedcoe.covid19.args:
    properties:
        metadata:
            type: string
            required: true
        model_prefix:
            type: string
            required: true
        outdir:
            type: string
            required: true
        ko_file:
            type: string
            required: true
        reps:
            type: integer
            required: true
        model:
            type: string
            required: true
        data_folder:
            type: string
            required: true
        simulation_time:
            type: integer
            required: true
These data types are application specific, and determined by the application provider.
Then, the application inputs should be declared. There is a number of common inputs for a common application, whose examples below are taken from Covid19 app (Note: some of these concrete inputs are application specific, determined by the application provider. Common ones are mentioned below):
- VAULT arguments required to obtain access credentials for target HPC and Data Service (DS), namely:
iam_jwt: jwt token issued by Keycloak as a result of a valid user authenticationiam_user: Keycloak user
- HPC infrastructure properties:
hpc_host: HPC frontend endpointhpc_scheduler: HPC scheduler used for task schedule. Valid supported options: SLURM, PBS, PYCOMPSShpc_scheduler_modules: optional list of module commands required to enable the hpc_scheduler (Note: this may be required for PYCOMPSs)monitor_scheduler: HPC scheduler use for monitoring. Valid supported options: SLURM, PBS
- Data access infrastructures:
hpc_dai_host: Data Access Infrastructure (DAI) hosting some data sourceshpc_dai_internet_access: boolean flag specifying if DAI host supports internet access
List of PYCOMPSs arguments, defined by type croupier.datatypes.pycompss_options.
- Application specific args:
job_pre_script: optional list of bash script commands to executed before task submissioncovid19_args: list of Covid19 arguments
The number and type of arguments are variable and they are decided by the application provider. For instance, several Vault services can be defined, sharing the same vault_user, but requiring different tokens. Several HPC infrastructures can be used to distribute workflow tasks, requiring dedicated configuration inputs for each infrastructure, hence. Similarly for data access infrastructures that host the data to be consumed or produced by workflow tasks. The number and kind of PYCOMPSs arguments can be different across applications.
Note: This COVID-19 workflow example uses PYCOMPSs as the workflow scheduler.
inputs:
  ########################## VAULT ######################
  iam_jwt:
      type: string
  iam_user:
      type: string

  ################# HPC Infrastructures #################
  hpc_host:
      type: string

  hpc_scheduler:
      type: string

  hpc_scheduler_modules:
      type: list

  monitor_scheduler:
      type: string

  ################## DS Infrastructures #################
  hpc_dai_host:
      type: string

  hpc_dai_internet_access:
      type: boolean

  target_dai_host:
      type: string

  target_dai_internet_access:
      type: boolean

  ################# Covid 19 application ################
  job_pre_script:
      type: list

  covid19_args:
      type: permedcoe.covid19.args

  ##################### PYCOMPSs args ###################
  pycompss_args:
      type: croupier.datatypes.pycompss_options
Next, if the application workflow needs to collect task execution metrics for monitoring, one hpc_exporter instance,
of type of type croupier.nodes.HPCExporter, must be declared
node_templates:
    hpc_exporter:
        type: croupier.nodes.HPCExporter
Then, one or more Vault nodes must be declared. Vault nodes are used
as secret stores where to retrieve from the credentials required to access
the target HPC infrastructures, through ssh, to schedule workflow’ tasks
(as jobs). The following block declares one Vault node of type croupier.nodes.Vault.
Note that Vault properties (jwt and user) are taken from inputs
by using the get_input function:
vault:
    type: croupier.nodes.Vault
    properties:
        jwt: { get_input: iam_jwt }
        user: { get_input: iam_user }
WORKFLOW SPECIFICATION
Then, one of more HPC infrastructures (where to execute the workflow’s tasks)
are declared as node instances of the type croupier.nodes.InfrastructureInterface
The mandatory properties of this type must be overridden by this node definition.
Other optional properties as well. In particular:
config/infrastructure_interfacemust be given with the name of the target HPC scheduler used to launch job tasks.credentials/hostmust also be given with the host name of the HPC frontend.
In this example, HPC configuration is read from declared inputs, as the application’s consumer will be prompted to provide those values. This is a common approach when the consumer selects a target HPC infrastructure where to execute the application. Alternatively, a fixed target HPC infrastructure can be specified in the workflow.
job_prefixdeclare a prefix for naming the submitted jobs.base_dirdeclares the path where Croupier folder for workflow execution will be created.monitoring_options/monitor_perioddeclares the period of Croupier’s requests to the HPC frontend to check the task job execution/queue status.monitoring_options/monitor_interfacedeclares the HPC scheduler used to collect partition/queue and task execution metrics. If not set, the HPC scheduler for task submission is used. It is required if task scheduler is PYCOMPSs, as it cannot be used for monitoringworkdir_prefixdeclares the name of the folder create for every task job executed. This folder will contain the deployed application, its execution logs and
Finally, the HPC infrastructure node is associated to the Vault node, by using
a relationship of type retrieve_credentials_from_vault that states that
the HPC credentials will be retrieved from that node,
declared in the target. Similarly, the relationship interface_monitored_by establishes the
monitoring exporter used to collect HPC partition/queues and task metrics
hpc:
    type: croupier.nodes.InfrastructureInterface
    properties:
        config:
            infrastructure_interface: { get_input: hpc_scheduler }
            modules: { get_input: hpc_scheduler_modules}
        credentials:
            host: { get_input: hpc_host }
        job_prefix: croupier
        base_dir: $HOME
        monitoring_options:
            monitor_period: 60
            monitor_interface: { get_input: monitor_scheduler }
        skip_cleanup: true
        workdir_prefix: "covid19-deploy"
    relationships:
        - type: retrieve_credentials_from_vault
          target: vault
        - type: interface_monitored_by
          target: hpc_exporter
In a similar way, the workflow provider can define additional HPC infrastructures in case the workflow’s tasks are distributed across them.
Next, one or more tasks are defined, as node instances of type
croupier.nodes.Job or its subclasses. In the following example,
a application task to be executed by PYCOMPSs is defined,
as an instance of type croupier.nodes.PyCOMPSsJob:
job:
    type: croupier.nodes.PyCOMPSsJob
    properties:
        job_options:
            pre_script: { get_input: job_pre_script}
            app_name: covid19
            app_source: permedcoe_apps/covid19/covid-19-workflow-main/Workflow/PyCOMPSs/src
            env:
                - COMPSS_PYTHON_VERSION: 3
                - PERMEDCOE_IMAGES: ${PERMEDCOE_IMAGES}
                - dataset: $HOME/permedcoe_apps/covid19/covid-19-workflow-main/Resources/data
            compss_args: { get_input: pycompss_args }
            app_file: '$(pwd)/covid19_pilot.py'
            app_args: { get_input: covid19_args }
        deployment:
            bootstrap: "scripts/deploy.sh"
            revert: "scripts/revert.sh"
            hpc_execution: false
        skip_cleanup: True
    relationships:
        - type: task_managed_by_interface
          target: hpc
        - type: input
          target: data_small
        - type: output
          target: covid_results
        - type: deployment_source
          target: github_data_access_infra
Every task type has its own properties, including those inherited
from the base type. For tasks of type croupier.nodes.PyCOMPSsJob,
like in above example, the properties required to define a task are encoded under the job_options property:
pre_script: list of commands to be executed before the application is submitted by the PYCOMPSs manager.app_name: the name of the applicationapp_source: path to the application task source, from where it will be executedenv: list of environment variablescompss_args: list of PYCOMPSs arguments. See PYCOMPSs documentation for more detailsapp_file: path to the application executable file, in the deployed folderapp_args: list of application arguments. Consult the concrete application documentation
Optionally, tasks can include a deployment property to request the deployment of the task app,
before it is scheduled in the target HPC. This property includes:
bootstrap: the path to the script that deploys the task application. This path is relative to the blueprint zip installed in Cloudify. This script is provided by the application workflow’s provider.revert: the path to the script that undeploys the task applicationhpc_execution: boolean stating whether or not the script should be executed within the HPC frontend. If false, it will be executed from Cloudify/Croupier host. This is relevant when HPC has not Internet access and app deployment requires external resources.
Next, the task is declared to be run in a HPC infrastructure by setting a relationship of type
task_managed_by_interface whose target points at a HPC node declared before.
Optionally, tasks inputs and outputs can be declared by using the input and output relationships, respectively.
They refer to data objects declared within the dataflow specification. See below subsection in Dataflow Specification.
In case a deployment block has been specified within the properties block, the server source for application deployment
can optionally be specified with the deployment_source relationship.
This is required when this deployment source is not hardcoded in the deployment script, so the application
can be deployed from a source to specify.
Note that in this specification of a PYCOMPSs task, some properties are
hardcoded by the application provider, while others
(e.g. app_source of compss_args, or app_args) are taken from the
declared workflow’s inputs, by using the get_input function. The
application provider decides what data must be provided by the consumer as input.
DATAFLOW SPECIFICATION
Besides the specification of the workflow, the application blueprint can include the specification of the dataflow, which consist of the declaration of :
data access infrastructures that host the data consumed/produced by the workflow
data objects consumed/produced by workflow tasks as inputs/outputs
data transfer objects that move data from one source to a target
Data access infrastructures are declared as node templates of type croupier.nodes.DataAccessInfrastructure
hpc_data_access_infra:
    type: croupier.nodes.DataAccessInfrastructure
    properties:
        endpoint: { get_input: hpc_dai_host }
        internet_access: { get_input: hpc_dai_internet_access }
        supported_protocols:
            - RSync
    relationships:
        - type: retrieve_credentials_from_vault
          target: vault
The mandatory endpoint property declares the data access infrastructure internet address: http(s)://<host>:<port>
. internet_access property declares whether or not that data infrastructure has access to Internet. Depending on this,
the data transfer objects can adopt different data transfer strategies. Alike the HPC infrastructure,
the retrieve_credentials_from_vault relationship can be established to use a declared Vault instance for
retrieving the user’s credentials for accessing this infrastructure.
Data objects are declared as node instances whose types depends on the kind of data object. Currently, there are supported:
croupier.nodes.FileDataSource: data object located at the filesystem of a remote server, typically accessible by (s)ftp or rsynccroupier.nodes.WebDataSource: data object located at a Cloud Web server, accessible by HTTP
Next example, from Covid 19 app, declares a data object of croupier.nodes.WebDataSource kind.
data_small_source:
    type: croupier.nodes.WebDataSource
    properties:
        resource: /PerMedCoE/covid-19-workflow/tree/main/Resources/data/small
    relationships:
        - type: ds_located_at
          target: github_data_access_infra
For Web data sources the property resource declares the route to the data within the infrastructure it is located,
which is declared with the ds_located_at relationship.
Next example, from Covid 19 app, declares a data object of croupier.nodes.FileDataSource kind.
data_small:
    type: croupier.nodes.FileDataSource
    properties:
        filepath: ~/permedcoe_apps/covid19/covid-19-workflow-main/Resources/data/small/
    relationships:
        - type: ds_located_at
          target: hpc_data_access_infra
For File data sources, the property filepath declares the path where the data is located within the
filesystem of the hosting infrastructure.
Data transfer objects declare objects that transfer the data located in their from_source relationship
into the data source target declared in their to_target relationship, by using the data transfer protocol
specified in the property transfer_protocol
dt_http:
    type: croupier.nodes.DataTransfer
    properties:
        transfer_protocol: HTTP
    relationships:
        - type: from_source
          target: data_small_source
        - type: to_target
          target: data_small
Application installation (Rol: application provider)
Frontend: Cloudify Web UI: http://cloudify.croupier.ari-aidata.eu/
The application provider can deploy an application into Croupier, by taking the following procedure:
Package the folder that contains the application workflow YAML description (and possibly other artefacts required for its deployment) into a zip file, named with with the application name.
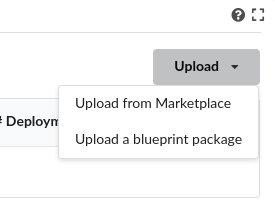
Log into Cloudify service, go to the Blueprints tab in the leftmost panel, click on the Upload button located on the right side, select the Upload a blueprint package option.
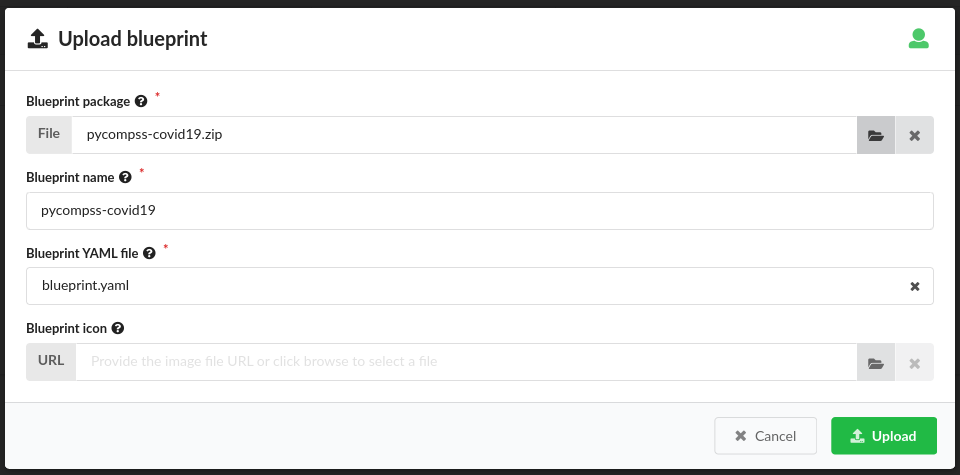
In the wizard, click on the left button with a folder icon located at the line for the Blueprint package field to browse your file system and locate your workflow zip file. When selected, the other wizard fields will be filled in automatically. Then, accept by clicking on Upload button.
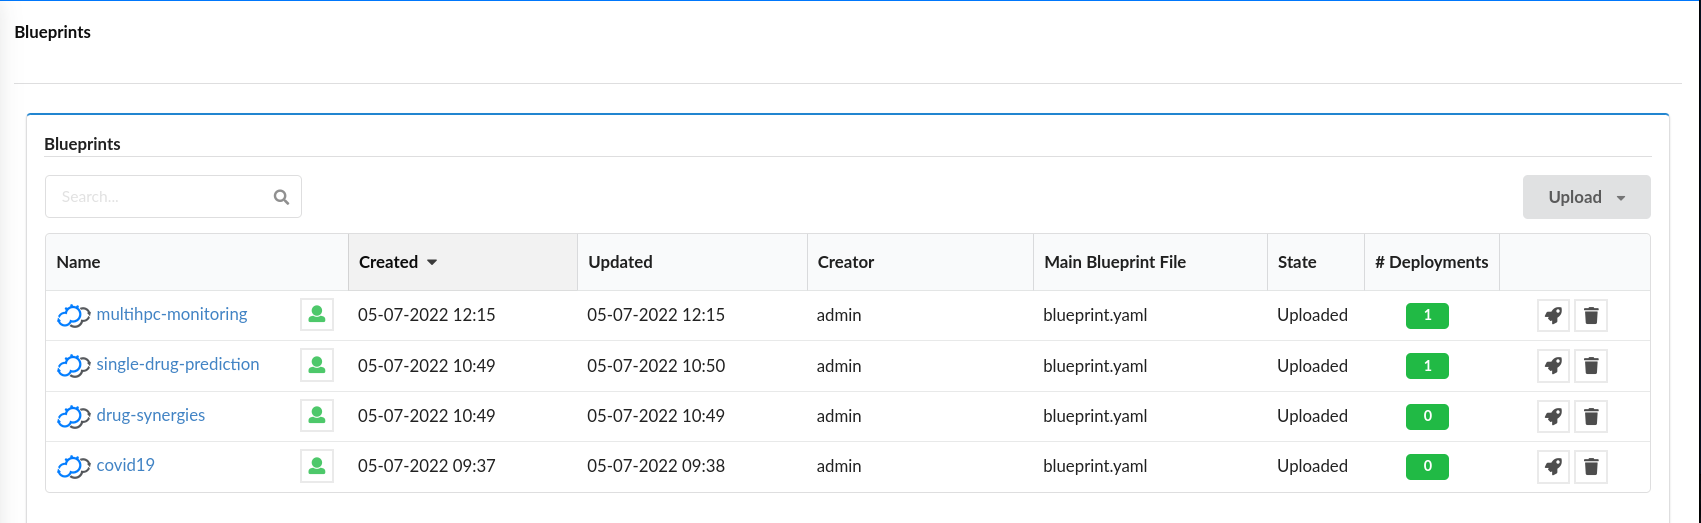
Confirm your application is listed in the list of blueprints
This procedure is followed by any application provider to deploy her applications into the Croupier marketplace, so that they will be available to be executed by any consumer that gets access.
Consumers can execute selected applications (from the list of blueprints) by following a procedure that consists of two steps:
A consumer’s instance of the application (i.e. workflow) is deployed in the target infrastructure(s) with a given set of inputs
The application’s instance is executed in the target infrastructure(s)
Application instance deployment (Rol: application consumer)
Frontend: Croupier Web UI: http://frontend.croupier.ari-aidata.eu/
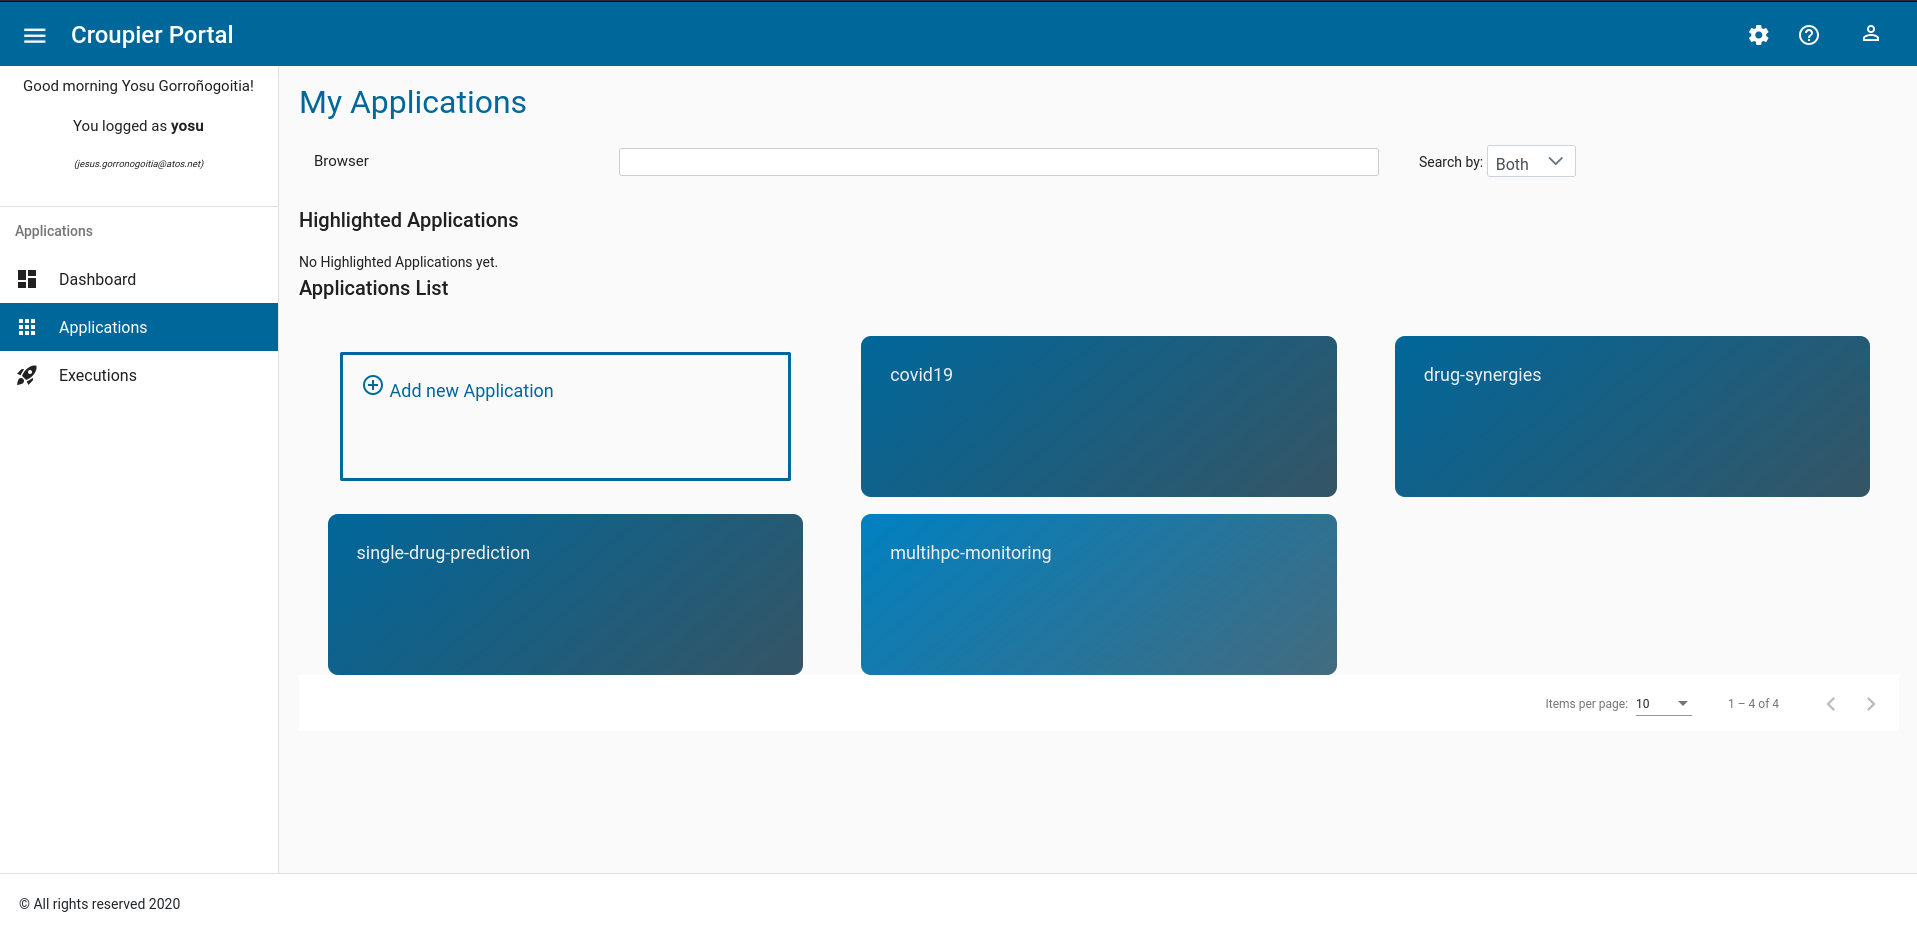
An application consumer can browse the list of available applications in the Croupier Web UI. For that, open the leftmost option bar (open it by clicking on the icon on the left of the Croupier Portal header), and select Applications. Then, available applications will be displayed in the page.
To deploy a consumer’s instance of an application, the consumer takes the following procedure:
Click on the icon of the selected application. Then, Croupier Web will show a page showing the application details. This page includes three tabs (i.e. Basic configuration, Expert configuration and Upload file) to provide inputs for the application instance that will be created. In this example, we use an external inputs file, so select the Upload file tab
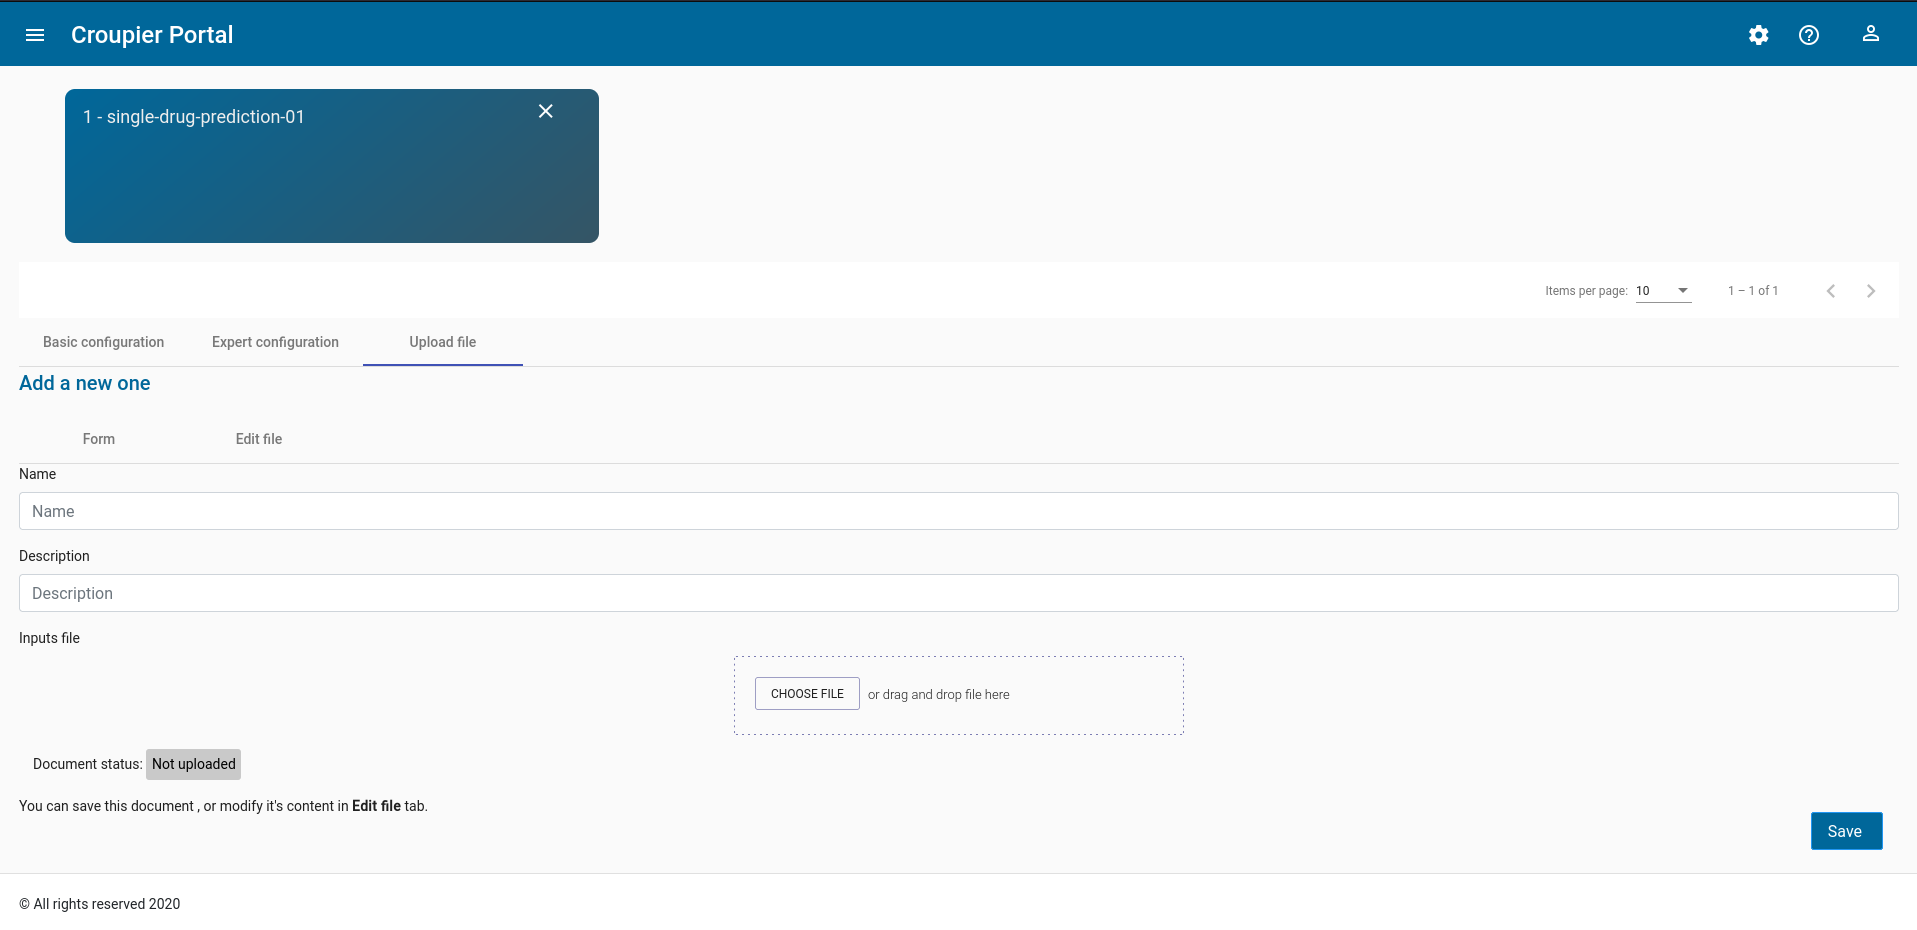
Click on the
Choose filebutton. Browse your file system and select your application inputs file.Next, you can verify the loaded inputs by selecting the
Expert configurationtab. Verify the loaded inputs, complete or modify them, if needed. Provide a name to your application instance.
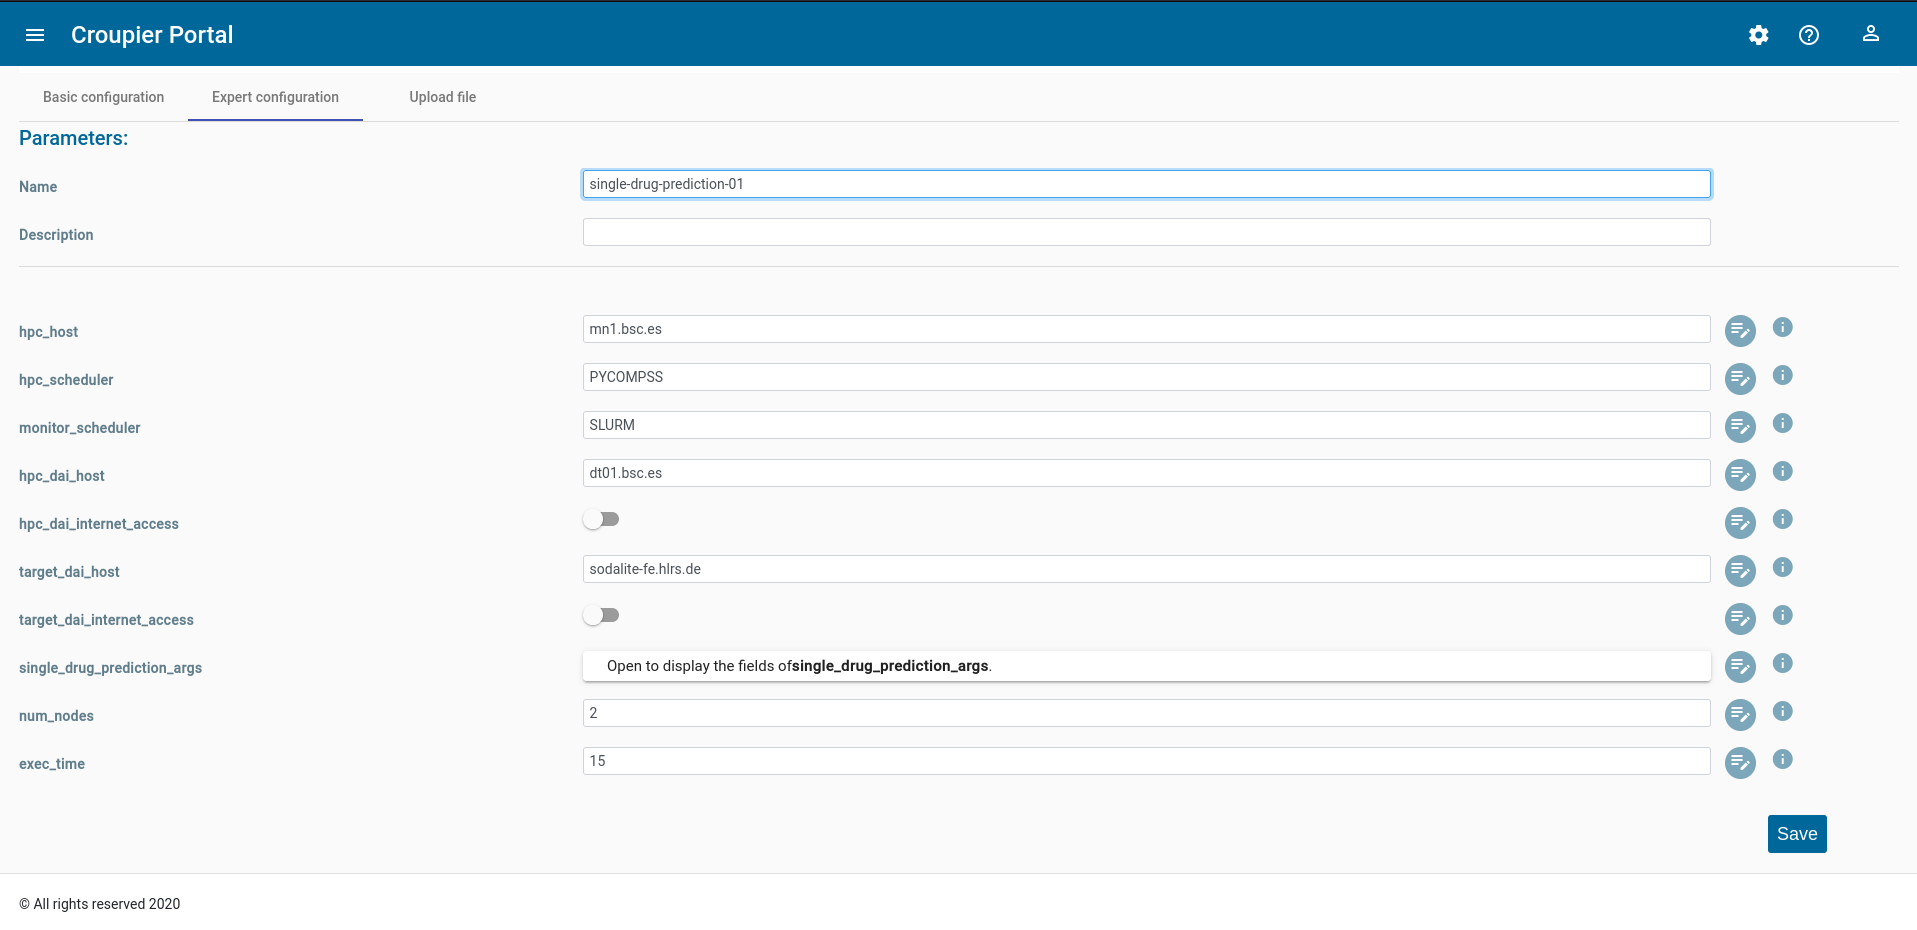
Once the application inputs’ values are provided, click on the Save button button to create the instance.
An example of inputs.yaml file for our Covid19 application is given below:
# WORKFLOW
# HPC infrastructures
# HPC
hpc_host: mn1.bsc.es
hpc_scheduler: PYCOMPSS
hpc_scheduler_modules:
  - export COMPSS_PYTHON_VERSION=3
  - module load COMPSs/3.0
  - module load singularity/3.5.2
  - module use /apps/modules/modulefiles/tools/COMPSs/libraries
  - module load permedcoe
monitor_scheduler: SLURM

# COVID19 args
job_pre_script:
  -
covid19_args:
  metadata: '${dataset}/metadata_clean.tsv'
  model_prefix: '${dataset}/epithelial_cell_2'
  outdir: '$(pwd)/results/'
  ko_file: '$(pwd)/ko_file.txt'
  reps: 2
  model: 'epithelial_cell_2'
  data_folder: '${dataset}'
  simulation_time: 100

# PYCOMPSs args
pycompss_args:
  num_nodes: 2
  exec_time: 45
  log_level: 'off'
  graph: true
  tracing: 'false'
  python_interpreter: python3
  qos: debug

# DATAFLOW
hpc_dai_host: dt01.bsc.es
hpc_dai_internet_access: false

target_dai_host: sodalite-fe.hlrs.de
target_dai_internet_access: false
These consumer’s specific inputs correspond to those declared in the Covid19 application’s workflow specification above. In particular, the consumer specifies the Mare Nostrum 4 as the HPC infrastructure where to deploy the application, as well as PyCOMPSs as its scheduler. Then, the consumer’s required inputs for the Covid19 application are also given, together with few PyCOMPSs execution parameters, which must be tuned according to the size of the Covid19 application inputs. Moreover, the data access infrastructures involved in this application dataflow are also provided.
When the application deployment starts, shows the application instance page.
This page gives details about the instance, including associated inputs, in the Details tab.
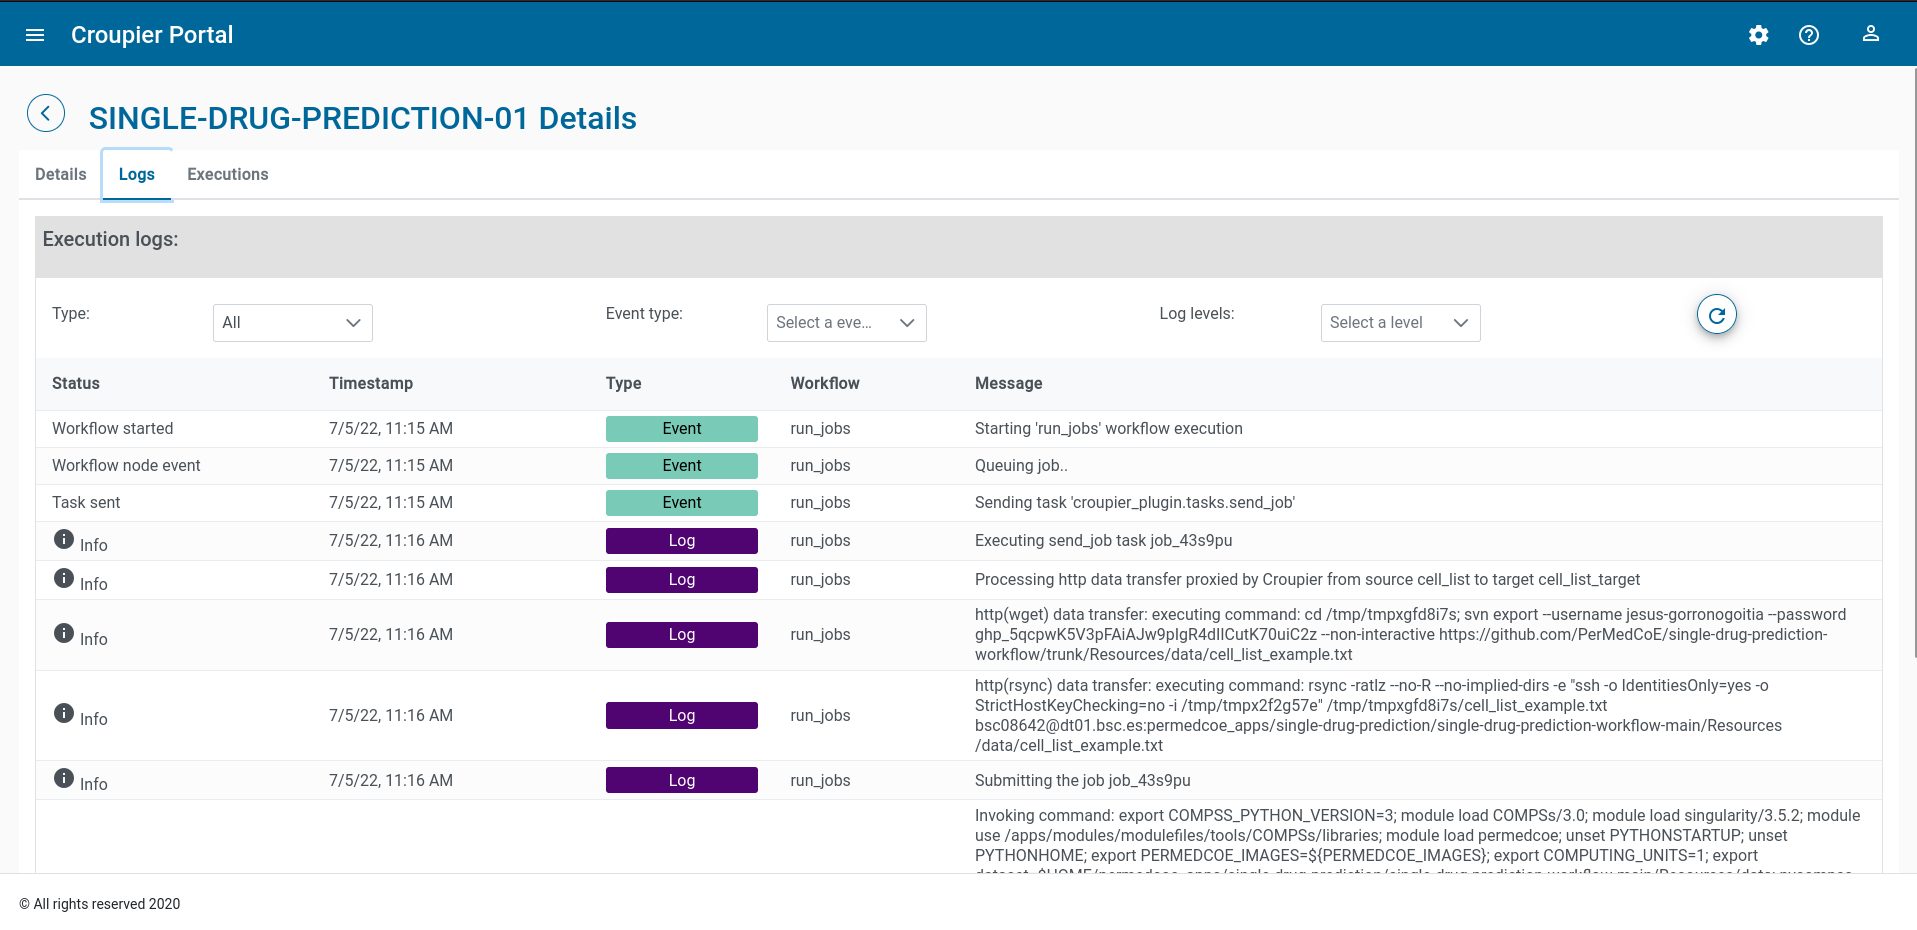
The Logs tab shows the logs of last executions.
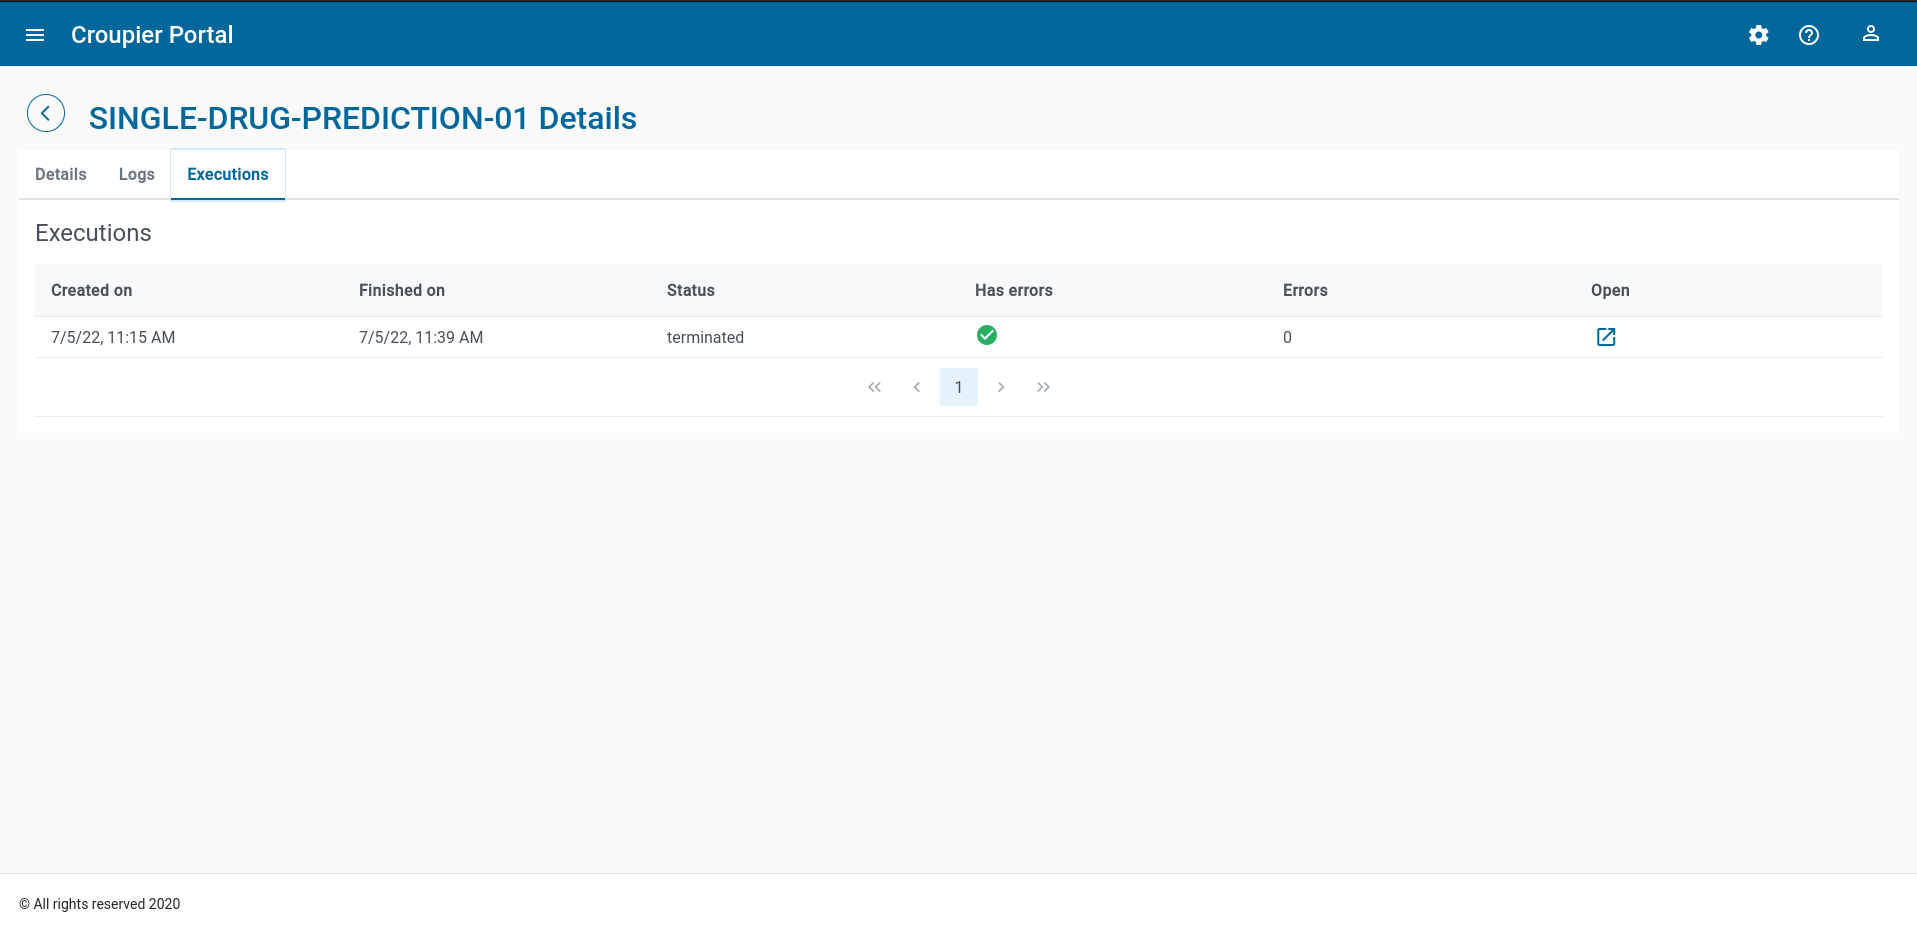
The Executions tab shows the list of executions.

Application instance execution
Once a consumer’s instance of the application has been deployed into the target HPC infrastructures, it can be executed.
To start a new execution, click on Execute button located at the bottom of the Details tab.
To see execution logs, click on the Logs tab. You can browse the logs
by moving through the pages, filter the logs by type, by event type, and log level.
You can refresh the logs page to fetch new ones.
To see the list of the instance executions, click on the Executions tab.
For each execution, timing, termination status, and the occurrence of errors is reported.
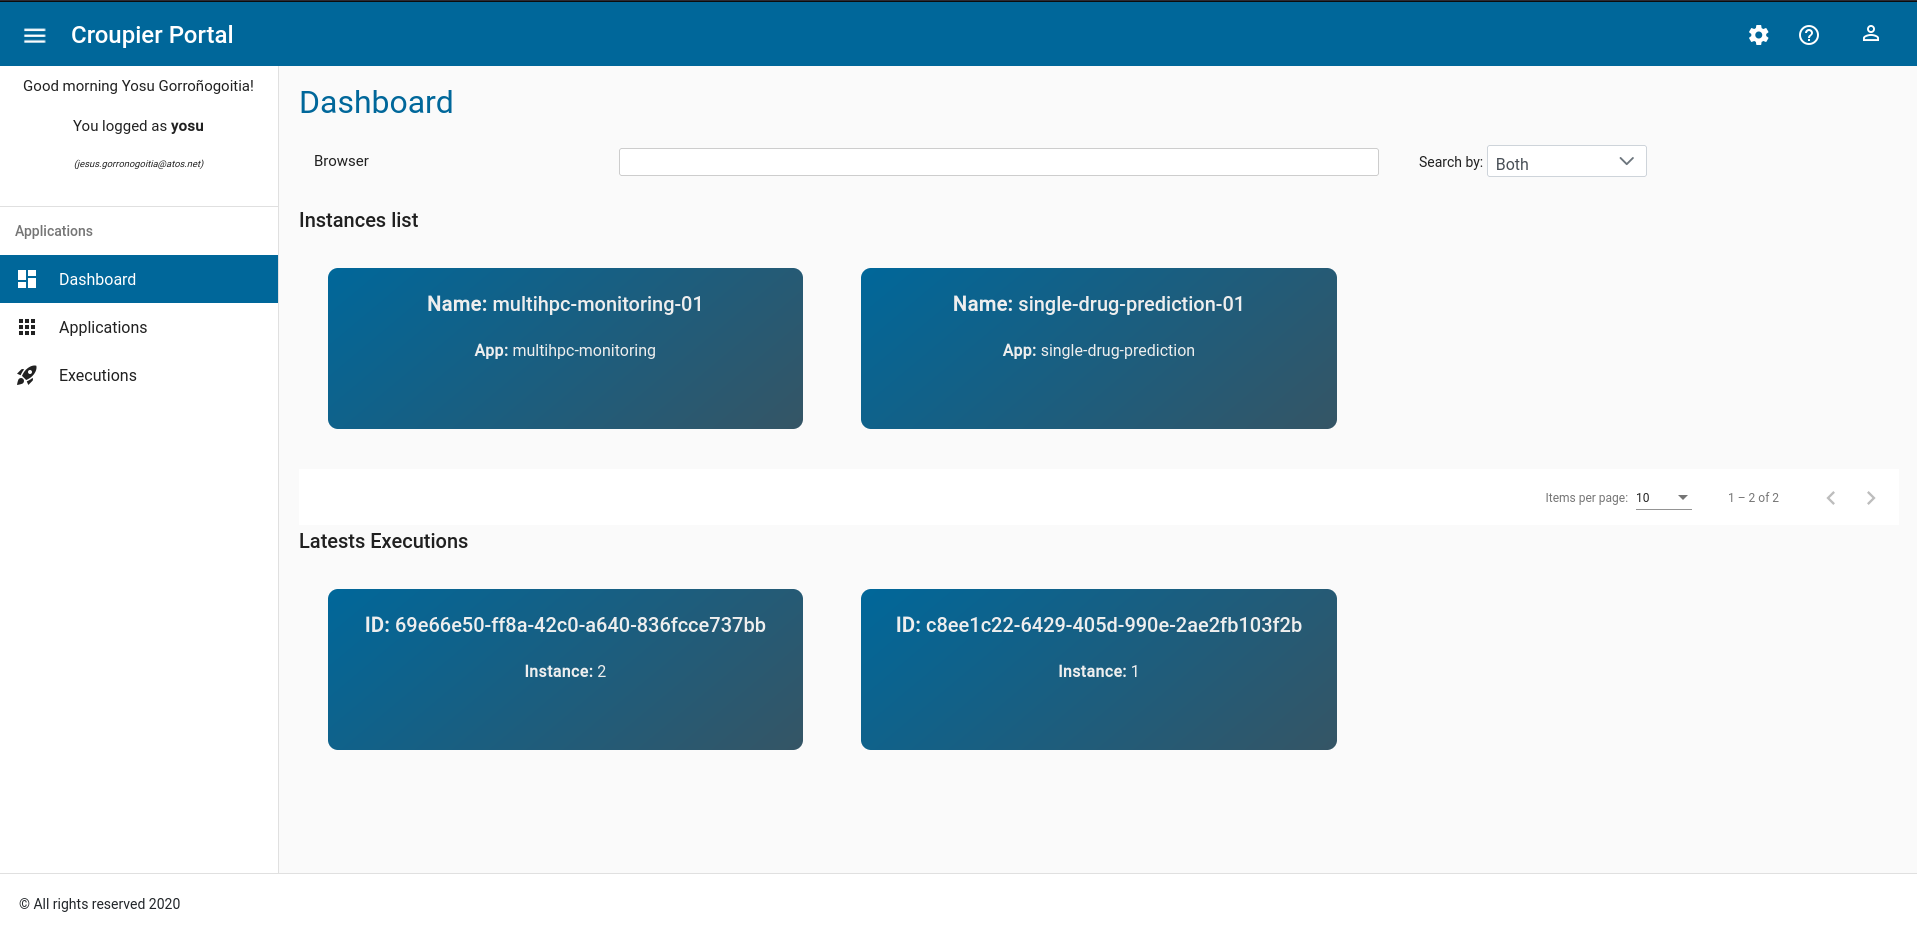
As a summary, the frontend dashboard (accessible from the leftmost option panel) shows all deployend instances (for any application) and the executions